
The Day After: A Step-by-Step Guide to Filing an Earthquake Claim
- Ron Gilbert

- 4 days ago
- 5 min read
The shaking has stopped. You’ve checked on your family, the dog has crawled out from under the sofa, and the adrenaline is starting to recede. Now comes the hard part: looking around and realizing that your home: your biggest investment: isn't quite the same as it was sixty seconds ago.
Living in Washington State, we know the "Big One" is a matter of when, not if. Whether it’s a localized rattle or a repeat of the 2001 Nisqually quake that caused over $2 billion in damages, the moments following an earthquake are critical.
At Rubens Insurance, we’ve been helping our neighbors navigate these kinds of surprises since 1968. We know that the claims process can feel like a second disaster if you aren't prepared. This guide is designed to walk you through exactly what to do "the day after" to ensure your earthquake claim goes as smoothly as possible.
Step 1: Safety First, Paperwork Second
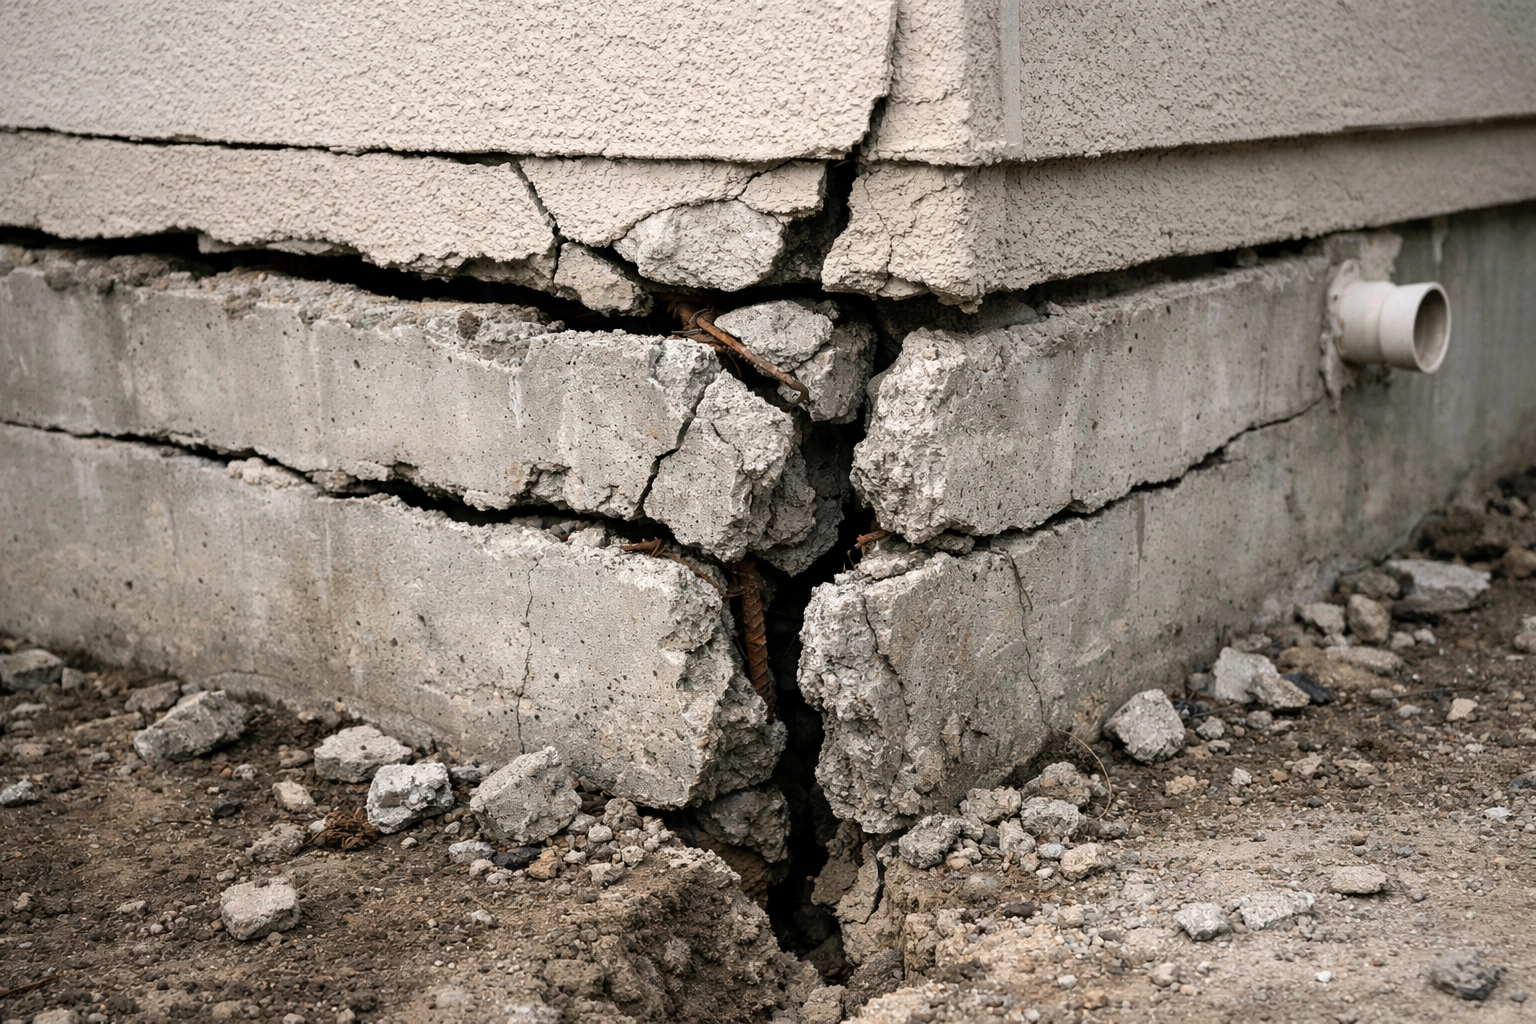
Before you even think about grabbing your camera or looking for your dec sheet, you need to ensure the structure is safe. Earthquakes often cause damage that isn't immediately visible to the naked eye.
Check for Gas Leaks: If you smell gas or hear a hissing sound, get everyone out immediately and turn off the main gas valve if it's safe to do so. Do not light matches or flip light switches.
Inspect Electrical Systems: Look for frayed wires or sparks. If you see damage, shut off the power at the main breaker.
Look Up: Check your chimney. In Washington, masonry chimneys are often the first things to fail. A cracked chimney can be a major fire hazard the next time you light a fire or can even collapse during an aftershock.
Water and Sewer Lines: Check for leaks in your plumbing. Damage to sewer lines can be one of the most expensive "hidden" costs of an earthquake.
Step 2: The Documentation Blitz
Once the house is stable and the immediate danger has passed, your smartphone becomes your best friend. In the insurance world, if it isn't documented, it’s much harder to prove.
Take "The Grand Tour": Walk through every room and take video and photos. Start from the outside and work your way in. Take photos of cracks in the foundation, gaps in door frames, and even small cracks in the drywall.
Don't Throw Anything Away: It’s tempting to start cleaning up broken glass and ruined belongings immediately. Stop. Before you toss that shattered $2,000 TV or the antique vase, take a photo of it. The adjuster needs to see the "before" state of the debris.
Note the Time: Keep a log of when you first noticed specific damage. This is important because aftershocks (which can happen for days) might cause additional damage. Most policies treat all shaking within a 72-hour window as a single "occurrence," meaning you only pay one deductible for that entire window of time.
Step 3: Find Your Insurance "Cheat Sheet" (The Dec Page)
This is where things often get confusing for homeowners. To understand what’s actually covered, you need to find your dec page insurance document.
So, what is a dec page in insurance? Think of it as the executive summary of your entire policy. While your full policy might be 50 pages of legal jargon, the dec page meaning is simple: it’s the "Declarations" page that lists who is covered, what is covered, and for how much.

When you look at a dec page example, you should look specifically for these items:
Earthquake Limit: This is the maximum amount the insurance company will pay for earthquake damage.
The Earthquake Deductible: This is the big one. Unlike your standard $500 or $1,000 home insurance deductible, earthquake deductibles are almost always a percentage: usually between 10% and 20% of your home's insured value.
Loss of Use: This covers your living expenses if your home is uninhabitable.
If you’re looking at your paperwork and wondering, "what is an insurance dec page and why does mine look so complicated?", don't worry. That’s why we’re here. At Rubens Insurance, we take pride in providing personalized service. You aren't just a policy number to us; you’re a member of the community we’ve served for over five decades. We can help you translate that dec sheet into plain English.
Step 4: Contact Rubens Insurance
Once you have a general idea of the damage, give us a call. You can reach out to us directly through our contact page or visit us at our office.
Why call your agent first instead of the big 1-800 number for the carrier?
Personal Guidance: We can help you determine if the damage is likely to exceed your deductible before you officially "open" a claim.
Local Knowledge: We understand the specific risks in Washington State, from the soil types in Seattle to the older masonry in places like Tacoma or Olympia.
Advocacy: We’ve been around since 1968. We know our providers and how they handle claims, and we’re here to make sure you get a fair shake.
Step 5: Prepare for the Adjuster
After the claim is filed, the insurance company will send an adjuster to inspect the property. This is a crucial meeting. Imagine a scenario where a stranger walks through your home for 45 minutes to decide how much money you’ll get to fix it. You want to be prepared.
Have your list ready: Don't rely on memory. Hand them a printed list of every crack, leak, and broken item you’ve found.
Point out the hidden stuff: If a door doesn't close as easily as it did yesterday, tell them. It could indicate a shifted foundation.
Keep a Claim Log: Start a notebook. Write down the date and time of every phone call, the name of every person you speak with, and what they told you. This creates a paper trail that is invaluable if there are delays or disputes later.
Step 6: Managing Repairs and "Loss of Use"
If your home is badly damaged, you might not be able to stay there. This is where the "Loss of Use" or "Additional Living Expenses" (ALE) portion of your policy kicks in.
Keep Every Receipt: If you have to stay in a hotel or eat out because your kitchen is destroyed, keep the receipts. These are often reimbursable, but only if you have the proof.
Don't Rush the Permanent Repairs: Your insurance company will likely authorize "emergency repairs" (like boarding up a window or tarping a roof) immediately. However, wait until you have a final settlement agreement before starting major permanent reconstructions.
Get Multiple Estimates: Don’t just take the first contractor’s word. Get a couple of bids to ensure the insurance settlement actually covers the real-world cost of materials and labor in the current Washington market.
Why the "Dec Page" Matters More Than Ever
We can't stress this enough: knowing what is a dec page in insurance before the earthquake happens is your best defense. If you wait until the ground is shaking to find out you have a 20% deductible on a $500,000 home, you’re looking at a $100,000 out-of-pocket expense before the insurance pays a dime.
Reviewing your dec page example today allows you to make adjustments while the sun is still shining. Are your limits high enough? Is your deductible manageable? We’re happy to sit down with you and review your protection options to make sure there are no surprises.
Decades of Local Experience
At Rubens Insurance, we’ve seen it all. We were here for the 1970s quakes, we were here in 2001, and we’ll be here for the next one. Our goal isn't just to sell you a policy; it’s to make sure that "the day after," you have the resources and the support you need to rebuild.
If you’re a homeowner or renter in Washington and you haven't looked at your dec sheet in a while, give us a shout. Let’s make sure you’re protected.
Ready to review your coverage? Get a Quote or Learn more about us.
Stay safe out there, Washington!

Comments